
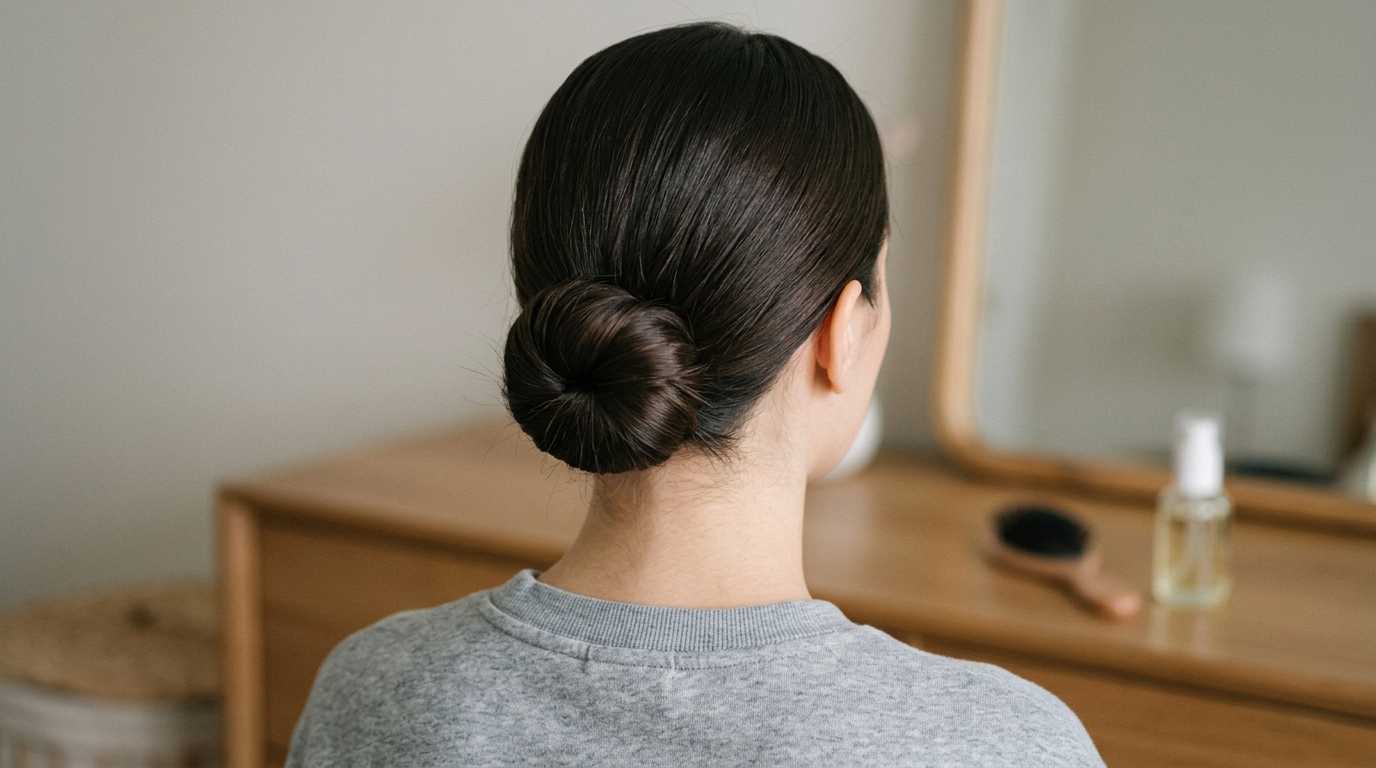
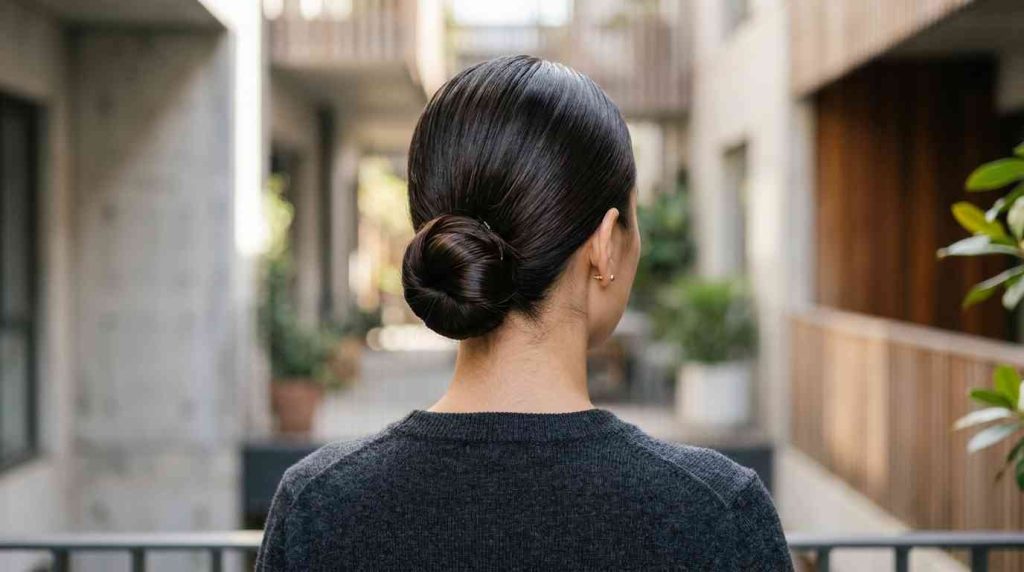
A sleek low bun is one of those hairstyles that looks polished, expensive, and put-together—yet it can be simple enough for a beginner. It works for workdays, weddings, interviews, and even quick errands when you want to look neat without trying too hard.
In this guide, you’ll learn how to do a sleek low bun for beginners using easy steps, simple tools, and a few small tricks that make a big difference.
What Is a Sleek Low Bun and Why Is It So Popular?
A sleek low bun is a smooth bun placed near the nape of your neck (low on the head). The hair is brushed flat, flyaways are controlled, and the finish looks clean and shiny.
It’s popular because it:
- Works on many hair types and lengths
- Takes less time than it looks like it should
- Pairs well with both casual and formal outfits
- Helps protect hair by keeping ends tucked away
What You Need to Create a Sleek Low Bun
You don’t need a long list of products. You just need the right basics.
Beginner Tools and Products Checklist
- Hairbrush (a paddle brush is great)
- Fine-tooth comb (optional, but helpful for smoothness)
- Hair elastic
- Bobby pins (a few strong ones)
- Hair gel, wax stick, or smoothing cream
- Hairspray (light to strong hold, depending on your hair)
- Hair serum or light oil (optional for shine)
- Rat-tail comb (optional for a neat part)
Quick Tool Guide Table
| Item | Why it helps | Beginner tip |
|---|---|---|
| Paddle brush | Smooths hair fast | Brush in sections for fewer bumps |
| Fine-tooth comb | Refines sleekness | Use lightly to avoid pulling |
| Gel or wax stick | Controls flyaways | Start small, add more if needed |
| Bobby pins | Locks the bun in place | Insert pins crossed for stronger hold |
| Hairspray | Sets the style | Spray from a distance to avoid crunch |
How to Prep Your Hair for a Sleek Finish
Preparation is where the “sleek” part really happens. If the base is smooth, the bun is much easier.
Start With the Right Hair Texture
A sleek low bun can be done on clean hair or slightly oily day-two hair. Many beginners find day-two hair easier because it grips better and stays in place.
If your hair is very clean and slippery, use a tiny amount of texture spray or a small dab of styling cream to help it hold.
Detangle and Control Frizz First
Brush through your hair fully. If your hair frizzes easily, rub a small amount of serum between your hands and smooth it over the top layer. Don’t overload the roots or it can look greasy.
Step-by-Step: How to Do a Sleek Low Bun for Beginners
This method is simple, clean, and reliable.
Step 1: Choose Your Part
Decide if you want:
- A middle part for a classic, balanced look
- A side part for a softer, more flattering finish
Use a rat-tail comb if you want a sharp, neat part. If not, finger-parting is fine for a beginner-friendly look.
Step 2: Smooth the Hair Back Gently
Brush your hair toward the back and down toward the nape of your neck. Work slowly and brush in layers—top, sides, then underneath—so you don’t trap bumps.
Apply a small amount of gel or smoothing cream to the outer layer of hair. Focus on:
- Hairline
- Sides above the ears
- Crown area where flyaways show up
Step 3: Gather Hair Into a Low Ponytail
Gather your hair at the nape of your neck. Keep your hands close to the scalp as you pull it together to maintain a sleek surface.
Tie it with an elastic. If the ponytail looks bumpy, loosen it and redo it—this is normal when you’re learning.
Step 4: Create the Bun Shape
Choose one of these beginner-proof bun methods:
- Twist bun: Twist the ponytail until it coils, then wrap it around the base.
- Loop bun: Pull the ponytail halfway through the elastic on the last loop to form a neat loop, then wrap the tail around.
Step 5: Pin It Securely
Use bobby pins to anchor the bun. Push pins in toward the center of the bun, then down into the hair at the base.
A simple rule: if the bun feels loose, add one pin at the “heavy” side first.
Step 6: Finish for a Sleek, Polished Look
Lightly smooth the top with your hands or a comb. Add:
- A tiny bit more gel or wax stick for flyaways
- A light mist of hairspray to set everything
If you want shine, use one drop of hair oil warmed between your palms and gently press it over the bun (not the roots).
Common Beginner Mistakes (and Easy Fixes)
Most sleek low bun problems come from a few small issues.
Too Many Bumps on the Crown
Fix: Brush in sections and smooth each section before gathering. Also, don’t rush the ponytail step.
The Bun Keeps Drooping
Fix: Tie the ponytail tighter, then use more pins at the base. Insert pins so they catch both the bun and the hair underneath.
Flyaways Won’t Stay Down
Fix: Use a wax stick or gel at the hairline, then press it down with the warmth of your fingers. Finish with hairspray sprayed from a distance.
It Looks Greasy Instead of Sleek
Fix: Use less product and apply it only to the outside layer. Avoid placing heavy gel directly at the roots if your hair gets oily quickly.
Sleek Low Bun Variations to Try Once You Learn the Basics
Once you can do the classic version, these variations keep the style fresh without making it harder.
Middle-Part Sleek Low Bun
This is the most classic option. It looks clean and modern, and it’s great for formal events.
Side-Part Sleek Low Bun
A side part can be more forgiving if you’re still learning, because it hides minor unevenness and can soften face shape.
Low Bun With a Wrapped Base
After tying the ponytail, take a small section of hair, wrap it around the elastic, and pin it underneath. It hides the hair tie and makes the bun look more “done.”
Variation Comparison Table
| Variation | Best for | Skill level |
|---|---|---|
| Middle part | Formal, minimal, sharp look | Beginner to intermediate |
| Side part | Soft look, everyday wear | Beginner |
| Wrapped base | More polished finish | Intermediate (still doable) |
How to Make a Sleek Low Bun Work for Your Hair Type
Different hair types need slightly different handling, but the same basic steps apply.
Fine or Thin Hair
- Use a smaller elastic so it grips
- Backcomb the ponytail lightly before wrapping for a fuller bun
- Use lightweight products to avoid flattening
Thick Hair
- Use a stronger elastic and extra pins
- Split the ponytail into two sections, twist both, then wrap together
- Use a firm-hold gel for smoother sides
Curly or Textured Hair
- Decide if you want it fully sleek or softly sleek
- Use a smoothing cream and a brush that works for your texture
- If you straighten edges, use heat protectant and keep heat minimal
Short to Medium Hair
- A low bun is still possible with bobby pins
- Leave a few shorter pieces out, then pin them around the bun
- Use hairspray to set the smaller ends
How Long Does It Take and How Long Will It Last?
As a beginner, your first few tries may take 10–15 minutes. After a little practice, many people can do it in 3–7 minutes.
How long it lasts depends on hair type and hold, but a well-pinned sleek low bun can stay neat all day. If you want extra staying power, finish with a stronger hold hairspray and use a few extra pins at the base.
Conclusion
Learning how to do a sleek low bun for beginners is mostly about building a smooth base, using the right amount of product, and pinning the bun securely. Once you get the basic method down, you can change the part, wrap the base, or adjust the finish to match any occasion.
With a little practice, this becomes one of the easiest go-to styles for looking polished in minutes.
