

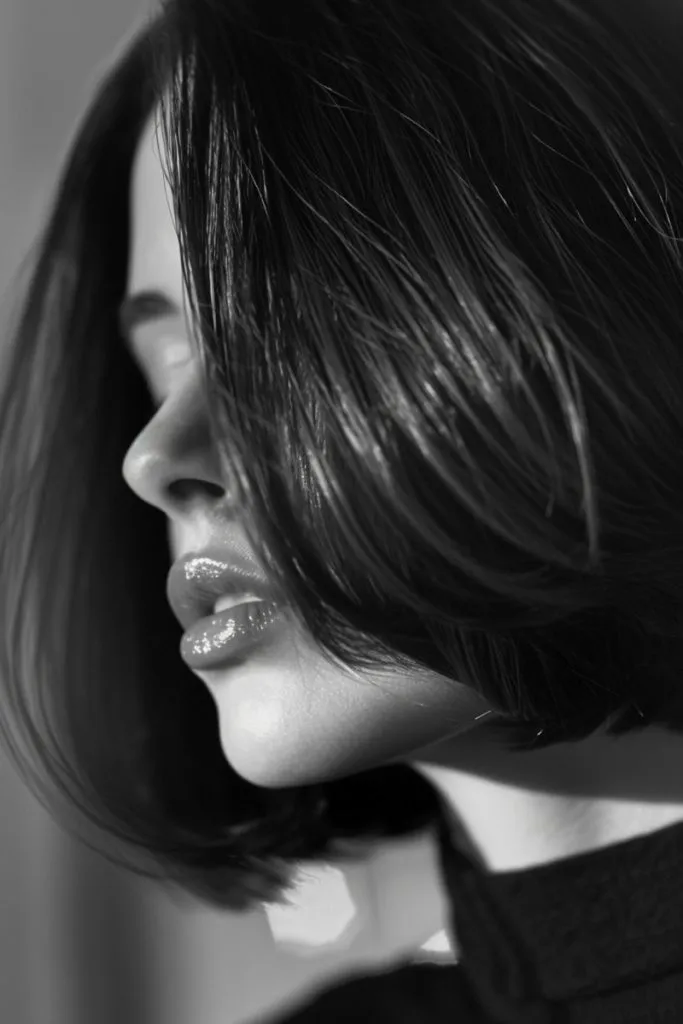
A bob haircut can look super neat and stylish, but it can also flip out or go flat if you dry it the wrong way. The good news is that you can get a smooth, soft, salon-like finish at home with the right method.
In this guide, you will learn how to blow dry a bob in a simple way. I will explain what tools you need, how to prep your hair, and how to shape the ends so your bob sits nicely.
Whether your bob is chin-length, a little longer (lob), or slightly layered, these steps will help you get shine, volume, and a clean shape.
What You’ll Need to Blow Dry a Bob?
To make blow drying easier, collect your tools first. This also helps you work faster and get a better result.

Source: Pinterest
- Hair dryer (a nozzle attachment is very helpful)
- Round brush (small or medium is best for most bobs)
- Sectioning clips
- Heat protectant spray
- Styling product (pick one):
- Mousse for volume
- Smoothing cream for frizz
- Root lift spray for flat hair
- Optional: paddle brush for a straighter finish
- Finishing items: light hairspray or a tiny drop of hair oil
How to Start So Your Bob Lays Right?
1. Towel-dry the right way
After washing, gently squeeze out extra water. Use a towel to blot, not rub, because rubbing can make frizz and tangles. Your hair should feel damp, not dripping wet. This makes blow drying quicker and smoother.
2. Apply product in the correct order
First, apply a heat protectant. Spread it through your hair so the ends and top are covered. Then add your styling product. Use a small amount so your bob does not feel heavy or greasy.
3. Rough dry to 70–80% before brushing
Before using a brush, rough dry with your hands. Keep the dryer moving so you do not overheat one area. When your hair is about 70–80% dry, it is much easier to control with a brush, and it will look less puffy
Step-by-Step: How to Blow Dry a Bob
Step 1: Create clean sections
Sectioning helps you dry evenly. If you try to dry everything at once, the top may look done but the underneath stays damp.
Split your hair into 3 parts: bottom (nape), middle, and top/crown. Clip the top sections up so you can focus on one area at a time.
Step 2: Blow dry the nape first
Start at the bottom near your neck. This part is usually the thickest and takes the longest to dry.
Point the dryer nozzle downward (from roots to ends). This helps the hair lie flat and look shiny instead of frizzy.
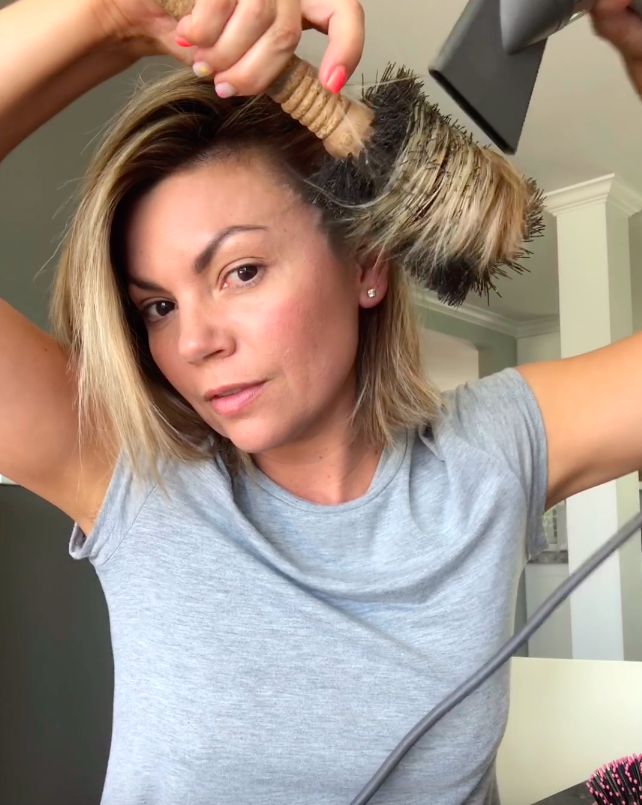
Step 3: Use the round brush to shape the ends
Take a small section and place the round brush under it. Pull the hair with gentle tension while you blow dry from the top of the section down to the ends.
Source: Pinterest
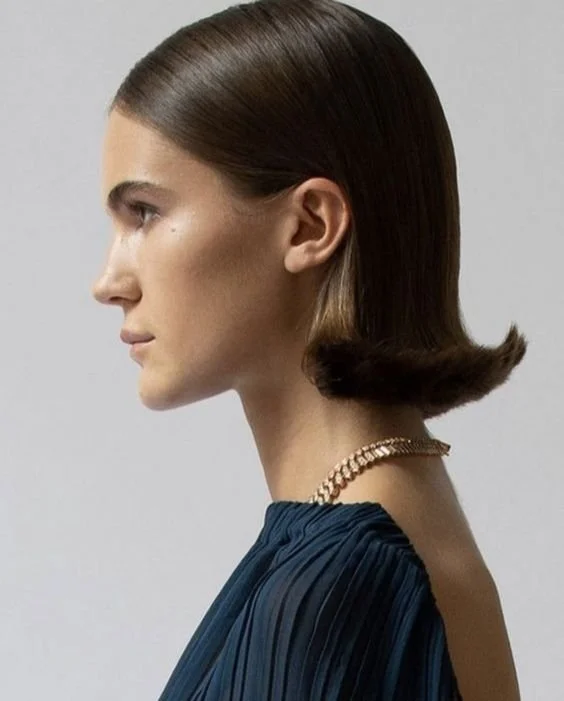
When you reach the ends, decide the look you want. Roll the brush slightly under for a classic bob curve, or keep it straighter for a modern finish.
Step 4: Perfect the sides (the “bob line”)
The sides are important because people notice them first. Dry one side at a time, using smaller sections for better control.
To help the bob frame your face, brush the hair slightly forward while drying. If you brush it too far back, the sides can look too wide or flip out.
Step 5: Style the top/crown for volume
The crown can go flat, especially on fine hair. Lift the hair at the roots with your brush and aim the dryer at the roots for a few seconds.
If you want extra volume, over-direct the top section (dry it slightly away from where it normally sits). Then let it fall back into place for a fuller look.
Step 6: Set with a cool shot
When each section is dry and shaped, use the cool shot button. Cool air helps set the style and makes it last longer.
Hold the shape for a moment while it cools, especially at the ends. This helps prevent the bob from flipping out later.
3 Ways to Blow Dry a Bob
1. Sleek & straight
Use a paddle brush or a round brush with less rolling. Keep the dryer pointed down and focus on smoothing. Finish with a tiny amount of serum on the ends, not the roots, so it stays light.
2. Classic curved-under bob
Use a medium or small round brush. Roll the brush under at the ends and warm it with the dryer. Use cool air at the end to lock in that soft bend.
3. Bouncy, volumized bob
Lift at the roots and use a round brush to create more movement. You can also set the top with clips or rollers for a few minutes after drying. Use a light hairspray so the bob stays bouncy, not stiff.
Common Mistakes
- Ends flip out: Use a smaller brush and roll under at the ends, then cool shot.
- Triangle shape (puffy sides): Use smaller sections and keep airflow downward. Do not over-lift the sides.
- Flat crown: Lift roots while drying and use root lift spray.
- Frizz: Use a nozzle, lower heat, and apply smoothing product.
- Hair feels heavy: Use less product and avoid oil near the scalp.
Bob Blow-Dry Tips by Hair Type
Fine hair: Use mousse or root spray for lift. Avoid heavy creams and too much oil. Dry the roots well first, because wet roots can make your style fall quickly.
Thick hair: Work in smaller sections and use stronger tension with the brush. A smoothing cream can help control puffiness. Make sure the underneath is fully dry, or the bob can look uneven.
Curly/wavy hair: Rough dry first, then use a brush when it is mostly dry. This reduces frizz and helps you shape the ends. If you want to keep natural waves, you can use a diffuser instead of a brush.
Frizzy hair: Use medium heat and steady airflow. Finish with a small amount of serum on the ends. Do not touch your hair too much while drying, because that can create more frizz.
How to Make a Blowout on a Bob Last Longer?
Sleep on a silk or satin pillowcase if you can. It helps reduce frizz and keeps the ends smoother.
In the morning, refresh only the parts that need help. Lightly mist the ends with water, then re-blow dry just those pieces for a quick fix.
Frequently Asked Questions
Q: What size round brush is best for a bob?
A: A small to medium round brush works best for most bobs. Shorter bobs usually need a smaller brush to shape the ends.
Q: Should I blow dry a bob forwards or backwards?
A: Slightly forward often helps the bob frame the face. Backwards can add volume, but it may also make the ends flip.
Q: How do I stop my bob from flipping out?
A: Dry the ends with a round brush rolled under, then cool shot. Also make sure your ends are fully dry.
Q: Can I blow dry a bob without a round brush?
A: Yes. You can use a paddle brush for a straighter look, or use your fingers for a quick, natural finish.
CONCLUSION
When you learn how to blow dry a bob, the goal is simple: make the hair sit in a clean shape with smooth ends. You do not need a salon or complicated tricks you just need to dry in sections, control the direction of the air, and shape the ends with your brush.
If you follow these basics, your bob will look neater, feel softer, and hold its style longer. With a little practice, you will be able to get a fresh, polished bob at home anytime.
